 ] (Save).
An external user who is not a registered taxpayer (has no tax identification number assigned to him) is allowed to perform the only functionality in the system - to prepare a d submit a general taxpayer registration form for becoming an individual taxpayer. When Individual registration form is successfully submitted, he can proceed with filing other taxpayer registration forms. To submit a new taxpayer registration form taxpayer current view should be opened:
1. Select menu “Taxpayer → Current view”. The current view of your registration forms is opened (see Figure 15). You can see different buttons depending on a state of a form:
1.1. Click [Fill new] next to the taxpayer registration form in a table. This button is not shown, when registration form is in state Submitted and processing. In this case you must wait for the approval or rejection of the form to amend approved registration form (using function 3.4 Amend registration data), or to start the new registration from the beginning.
1.2. If taxpayer registration form filling had been started earlier and was saved, click button [Continue filling] to proceed with form filling.
2. System opens taxpayer registration form. Registration form buttons and navigation is described in a filler help pages (Figure 70).
3. Fill the information into given registration form fields (see Figure 19).
4. Add mandatory attachments and prepare data for submission:
4.1. To save the entered
data click button [] (Save).
4.2. Click button [Attachments], to upload required attachments. Detailed instructions how to upload attachments are given online in a filler help pages.
4.3.1. If there are any errors or warnings found, the system displays them in an errors/warnings window. Click on the particular error/warning to be redirected to the related data field.
5. If all data is valid and correct click button [Submit]. If you’ve missed step 4.3, validation is done automatically. And you have to correct incorrect data.
6. After successful submission registration state is set to Submitted and processing. The registration record can be found in a list of registration forms history (see 3.6 View registration forms history).
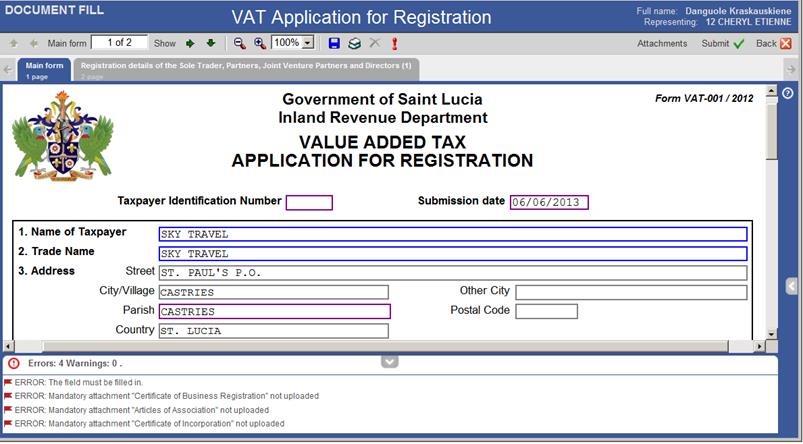
Figure 19 Registration form in editable mode
7. When a decision is made to submitted registration form the system sends you an e-mail and an information message informing about:
7.1. Approval. In this case registration’s state is set to “Approved”.
7.2. Or rejection. In this case rejection reason is included into e-mail and information message. Registration state is set to “Rejected”.
 ]
(validate) to validate registration form fields and attachments. System checks
if all mandatory attachments are uploaded and all required fields are filled in
with appropriate information.
]
(validate) to validate registration form fields and attachments. System checks
if all mandatory attachments are uploaded and all required fields are filled in
with appropriate information.